I occasionally come across the need to encode/decode a string to/from base64. Given that I primarily program using JavaScript, the atob
and btoa
functions have been my go-to.
For a long time I thought the names of these functions were strange. They seem like they are trying to be words — and that's what they were to me (each a single odd-sounding word) the first few times I used them1 — but I soon came to see them for what they were at face value: functions for converting from A to B and vice versa, but lowercased for reasons™.
Having learned how to say the names of these functions out loud without embarrassing myself, the only thing left to close off the matter was to figure out what A and B were. Luckily for me, I already had the answer; introducing Alice and Bob.
Briefly, Alice and Bob are a recurring pair of characters, often used in examples where messages are being sent over a network using some form of encryption. To my young programmer mind, encoding to base64 was not too distant a concept from encryption for me to jump to the conclusion that — where atob
and btoa
are concerned — A is for Alice and B is for Bob.
Over time, I developed the characters of Alice and Bob to match what the functions do. One of them was security-concious, encoding all the messages they sent. The other was care-free, sending plain text messages left and right. I could never remember which was which.
I've been trying for years to switch from using Postman to an alternative. Most attempts at switching have involved reading a few pages of documentation and scouring open issues on GitHub before culminating in an "I don't have time for this" rage quit2.
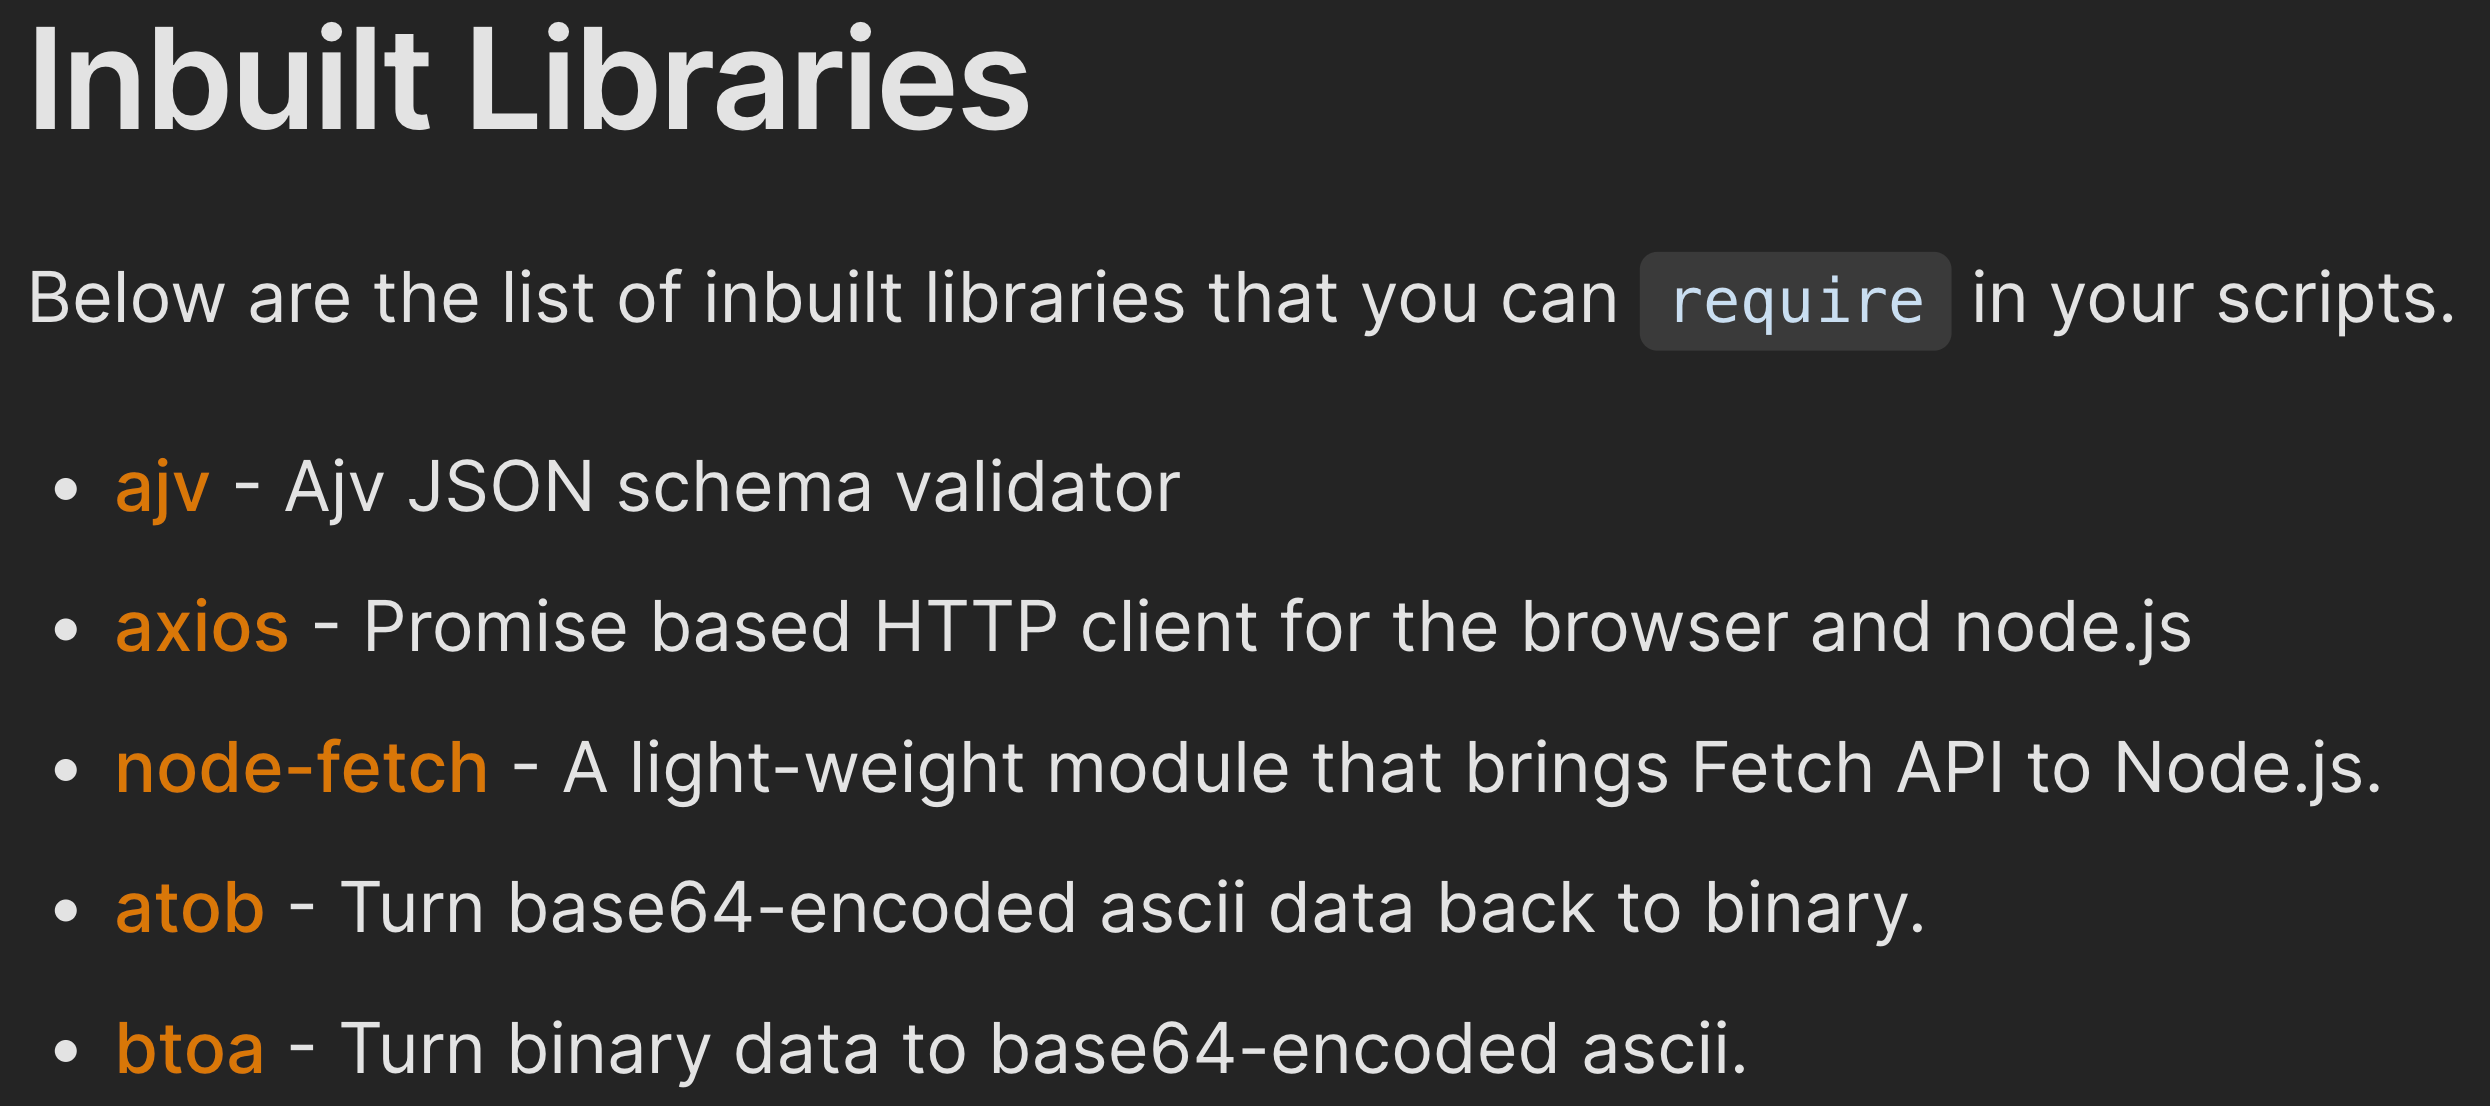
While embarking on my most recent attempt at switching off of Postman, I was reading through the Bruno docs and came across this section regarding libraries that are built-in and available for use when scripting:
The denial lasted a few seconds, but I've now successfully crossed over from an alternate universe into the one you and I currently live in, where A is for base64-encoded ascii and B is for binary string.
At its core, publishing a package to the NPM registry boils down to a single command:
npm publish
There is, however, more nuance once we dig below the surface. In this article, I'll briefly cover the concept of tags from the perspective of a publisher.
NPM supports tagging versions of a package1. Tags are essentially aliases for a particular version. The latest
tag is applied by default any time a new version of a package is published.
If you want users to be able to opt in to download a prerelease version of your package via the NPM registry, you'll likely want to avoid publishing that prerelease version of your package with the latest
tag. Assume we were working on a package that was on version 1.0.0
. We could publish a minor prerelease version by first bumping the version in the local package.json
to 1.1.0-beta.0
2, then using the —-tag
flag to declare a custom tag as shown:
npm publish --tag beta
This would push version 1.1.0-beta.0
of the package to the NPM registry and apply the custom beta
tag.
Mistakes do happen and it's well within the realm of possibility that we misspell the beta
tag or forget to declare it in the first place. Let's explore the latter situation: we accidentally published version 1.1.0-beta.0
of our package without specifying the tag to be used — causing it to default to the latest
tag. Thankfully, it's possible to modify the tag of an already published package version by using npm dist-tag
. To apply the beta
tag retroactively, we'd use the following command:
npm dist-tag add my-package@1.1.0-beta.0 beta
Doing so applies the beta
tag to version 1.1.0-beta.0
of our package. It also has another side effect: the latest
tag will be moved to the previously published version of our package: 1.0.0
. This happens because, in the NPM registry, a single version of a package cannot have multiple tags at the same time.
The tagging system has 2 rules:
There is an "optional" (see the next rule below) 1-to-1 bidirectional mapping between a version and a tag, i.e., a version can have at most one tag and a tag can be applied to at most one version.
The latest
tag must exist.
While modifying the version number manually in the package.json
is totally fine, the npm CLI also provides a way to do just this. Bumping the version from 1.0.0
to 1.1.0-beta.0
can be done by running the following command:
npm version preminor --preid=beta
The following command can then be used to bump the prerelease version form 1.1.0-beta.0
to 1.1.0-beta.1:
npm version prerelease
When ready to release a stable version, going from 1.1.0-beta.1
to 1.1.0
can be done with the more familiar:
npm version minor
↩︎I use 1Password as my password manager but didn't really see much need for the CLI that they provide until fairly recently. I'll go over a couple of use cases where the CLI has integrated really well into my flow.
I've been using aerc
1 for a few weeks. When you add an email account to aerc
, it saves the password in a configuration file (~/.config/aerc/accounts.conf
for me), an example of which can be seen below:
[Fastmail]
source = imaps://user%40fastmail.com:agvsbg8gd29ybgqh@imap.fastmail.com
outgoing = smtps://user%40fastmail.com:agvsbg8gd29ybgqh@imap.fastmail.com
Having the password stored in plain text2 is less than ideal, even if it is on a device you own. Helpfully, aerc
provides a way to specify an arbitrary command that can be executed to retrieve the password. To use the 1Password CLI, the accounts configuration file can be modified as follows:
[Fastmail]
source = imaps://user%40fastmail.com@imap.fastmail.com
source-cred-cmd = op read op://MyVault/Fastmail/aerc-password
outgoing = smtps://user%40fastmail.com@imap.fastmail.com
outgoing-cred-cmd = op read op://MyVault/Fastmail/aerc-password
The command we want executed is op read
, and we pass it the URL3 of the secret to access. The next time aerc
is launched, a TouchID prompt, or a prompt to Allow Access
, will be presented as shown below:
As a publisher of npm packages, it's a good idea to enable 2FA on your npm account. This makes a leaked token with write-access less of a risk since no writes (such as publishing a new version of a package) can be performed without a valid OTP.
When publishing an npm package using npm publish
, a prompt is shown in the terminal asking the user to type in the OTP. However, there is also an --otp
flag we can make use of to provide the OTP upfront:
npm publish --otp $(op item get NPM --otp)
This time we use the op item get
command4, passing it the name of the item and the --otp
flag. Upon execution, a TouchID prompt or an Allow Access
prompt is presented, removing the need to manually type or paste the OTP. As an added convenience, the above command can be bound to a shell alias.
This helpful URL scheme shows that the password is agvsbg8gd29ybgqh
.
↩︎
The URL takes the form:
op://<vault>/<item>[/<section>]/<field>
↩︎Note that if we tried using the op read
command:
op read 'op://MyVault/NPM/Security/one-time password'
instead of the current OTP being returned, we would get the reference URL used to generate the OTP:
otpauth://totp/croccifixio?secret=AGVSBG8GD29YBGQHIGDVB2QGBMLNAHQ1&issuer=npm
↩︎With the onset of the COVID-19 pandemic, I shifted to a hybrid/remote work setup. With it came more frequent online meetings, and the need to toggle my microphone at a moment's notice.
I longed for a life free of fumbling through multiple desktops, windows and tabs in an effort to unmute myself when a question was directed to me during a meeting — a situation I often find myself in since I prefer working on a single display.
If your primary meeting platform is Slack, you have access to a handy shortcut for toggling your microphone: Cmd
+ Shift
+ Space
. This works even if the Slack app is not in focus. But it does require the Slack app to be installed. If you're using Slack via a browser, then that tab must be in focus for the shortcut to work.
In my case I moved away from installing dedicated apps for each instant messaging platform I use, and instead migrated them to permanent tabs in my browser1. A significant portion of my meetings also took place over Microsoft Teams, so having a shortcut work for Slack but not Teams — or any other app — was far from ideal.
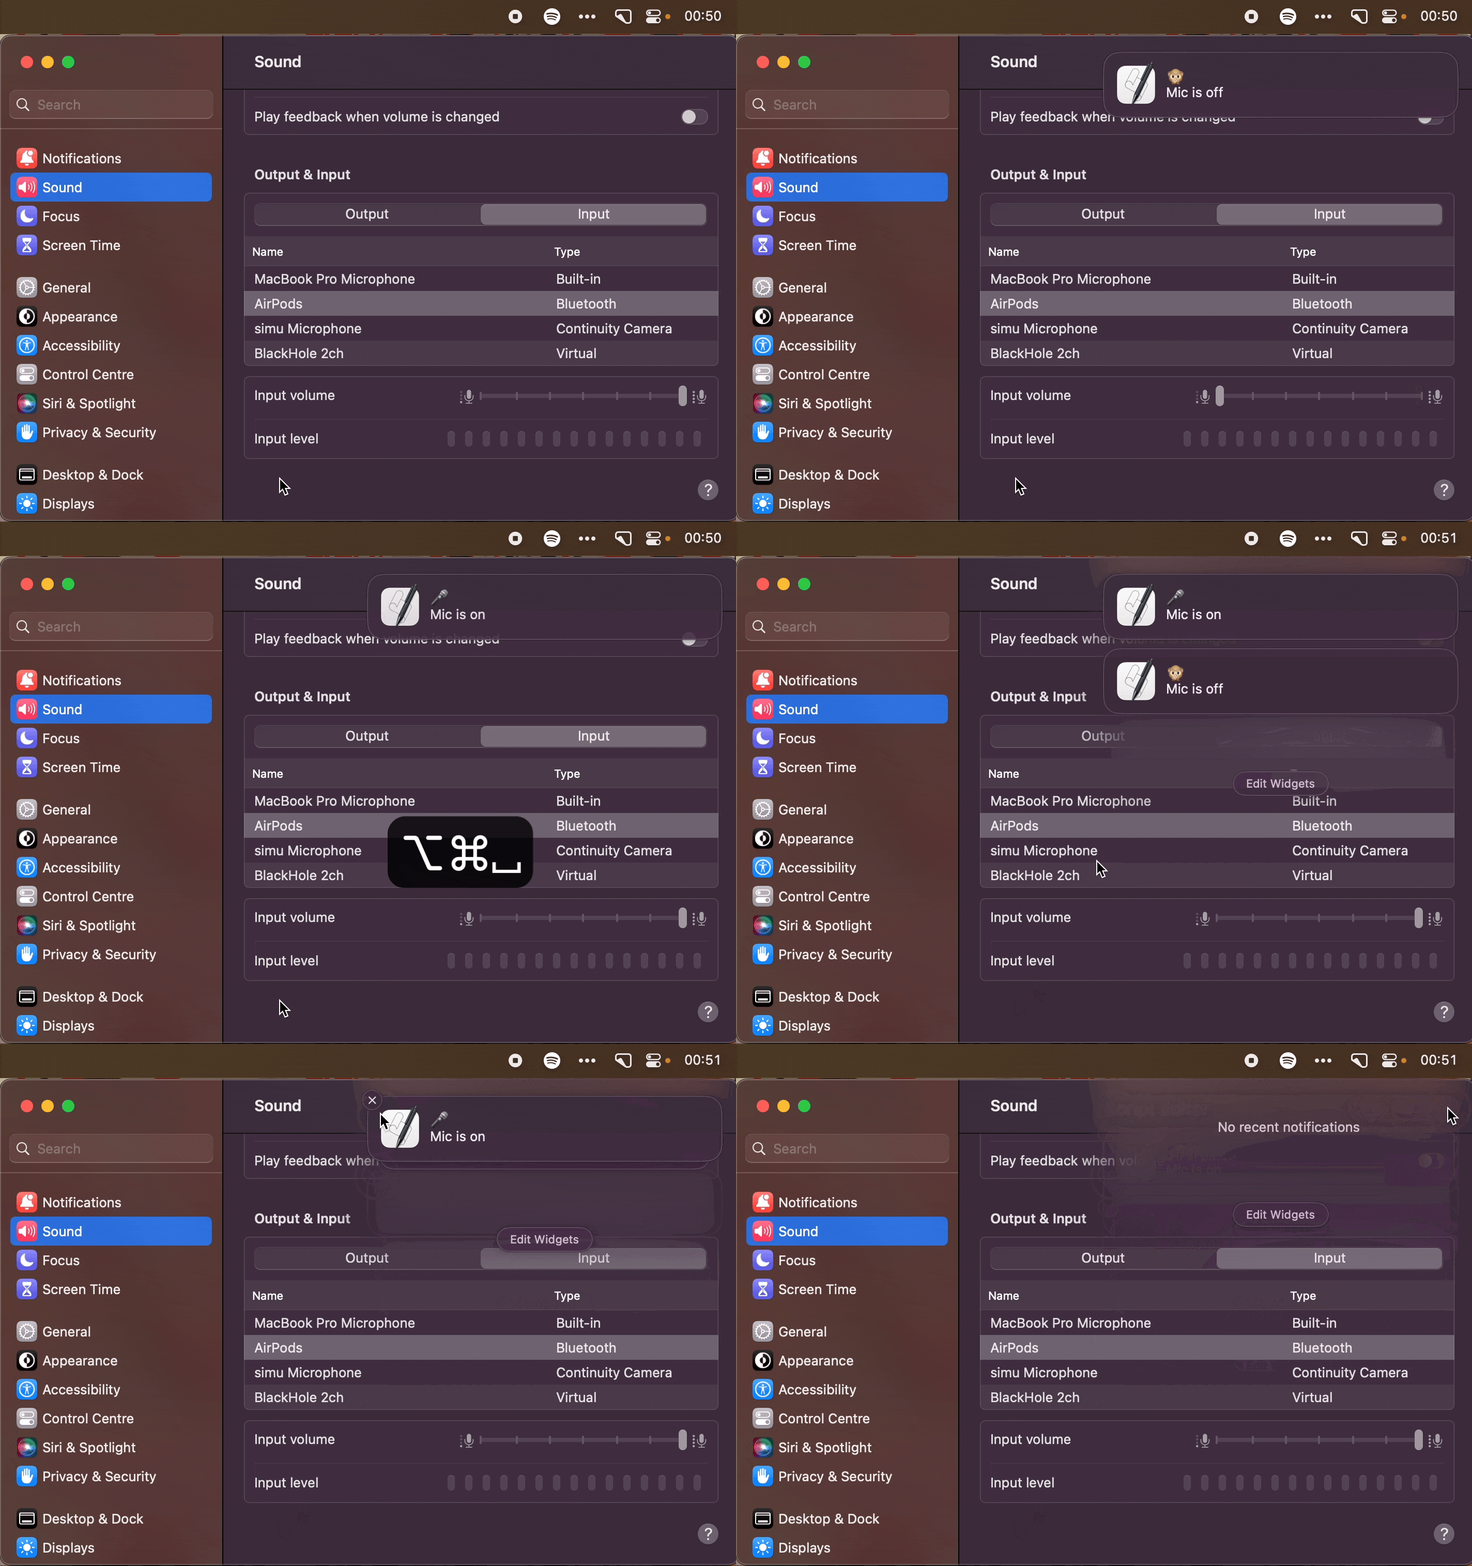
After some searching around, I came across this article describing how to mute the microphone on macOS. I set up the applescript2 as described and hooked it up so that it triggers when I press a keyboard shortcut.
The one thing missing though, was visual feedback to indicate what state the microphone is in. Applescript can trigger macOS notifications, so I modified the script to do just that each time it runs:
on getMicrophoneVolume()
input volume of (get volume settings)
end getMicrophoneVolume
on disableMicrophone()
set volume input volume 0
display notification "microphone is off" with title "🙊"
end disableMicrophone
on enableMicrophone()
set volume input volume 100
display notification "microphone is on" with title "🎤"
end enableMicrophone
if getMicrophoneVolume() is greater than 0 then
disableMicrophone()
else
enableMicrophone()
end if
The downside, however, is a clogged up notification center. It's not very worthwhile knowing that I unmuted my microphone at 16:55. Clearing out the notifications felt like a chore.
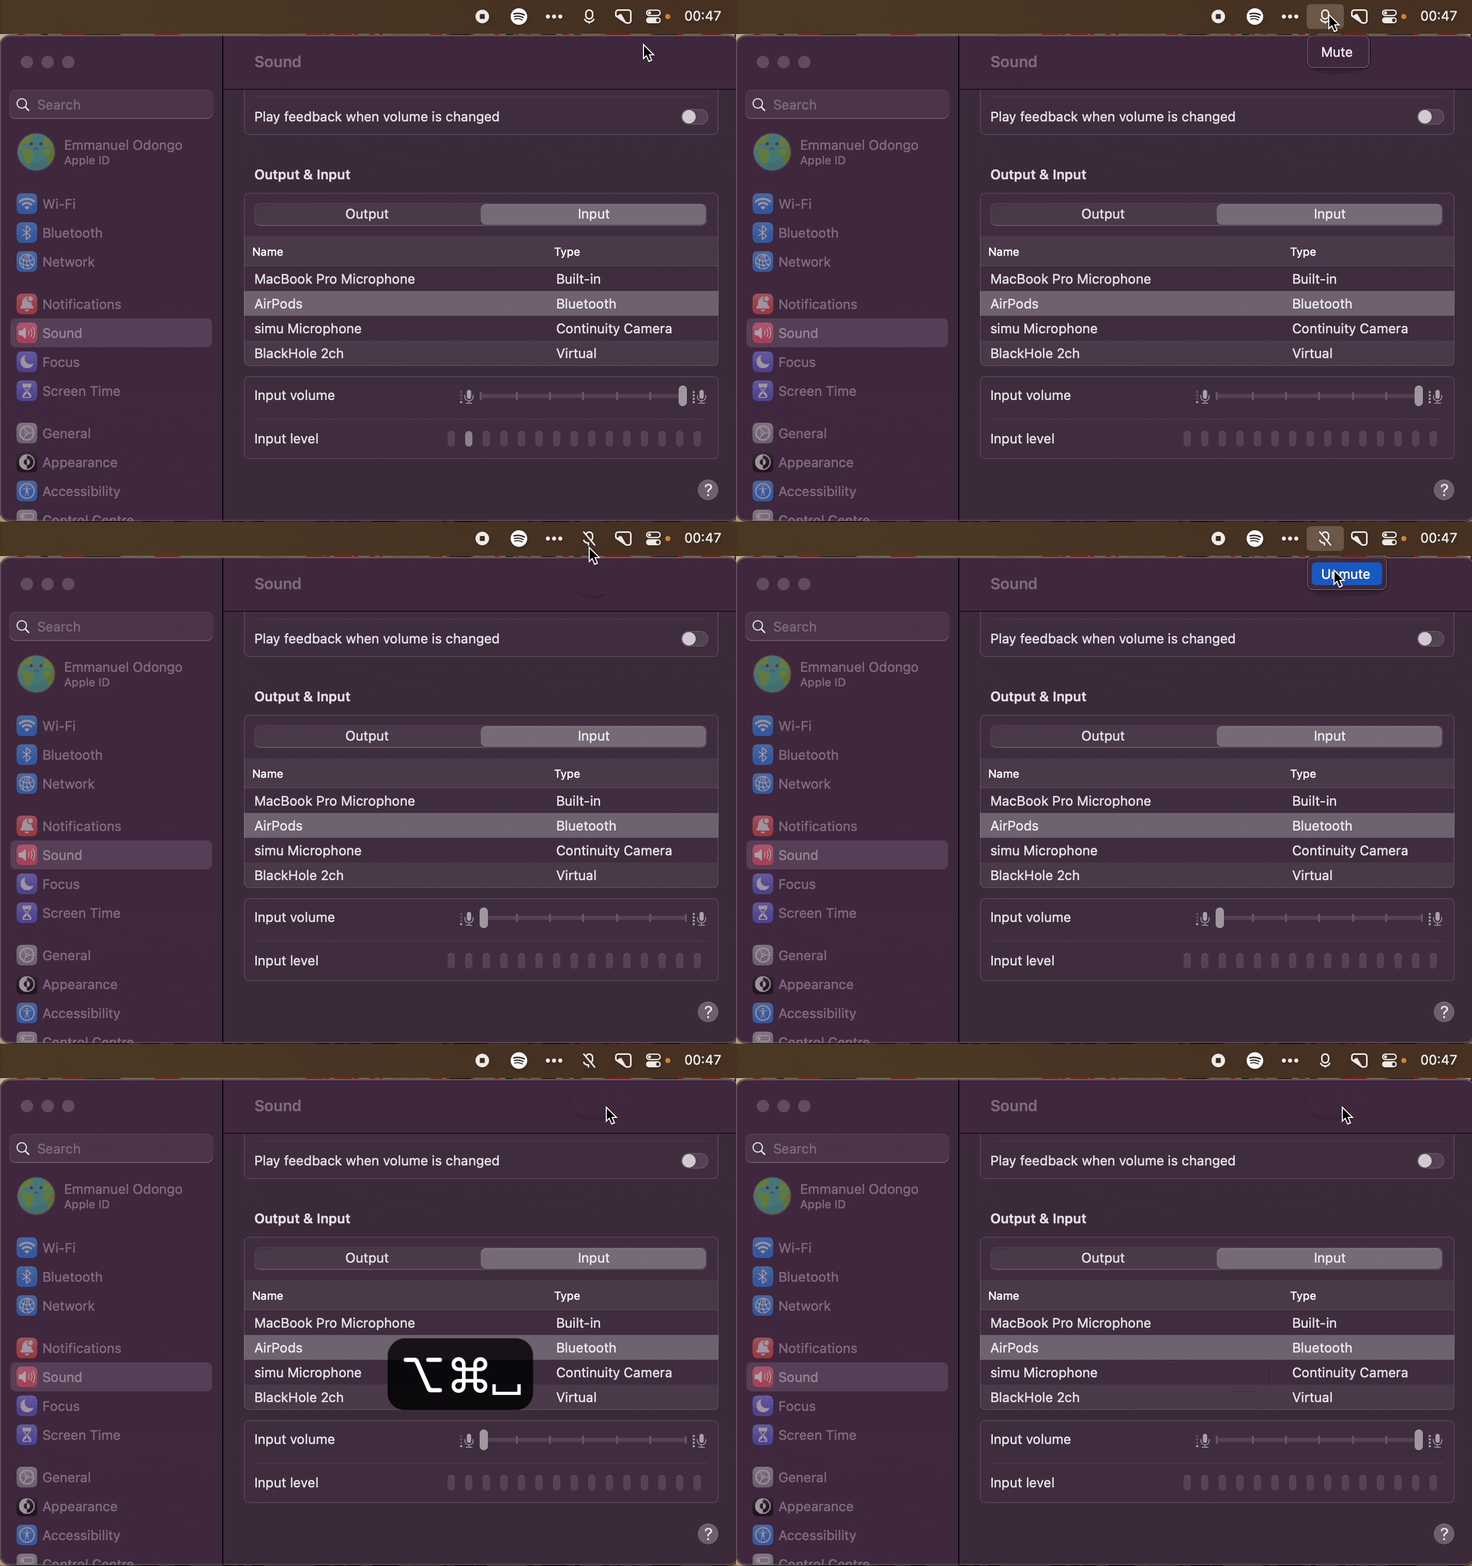
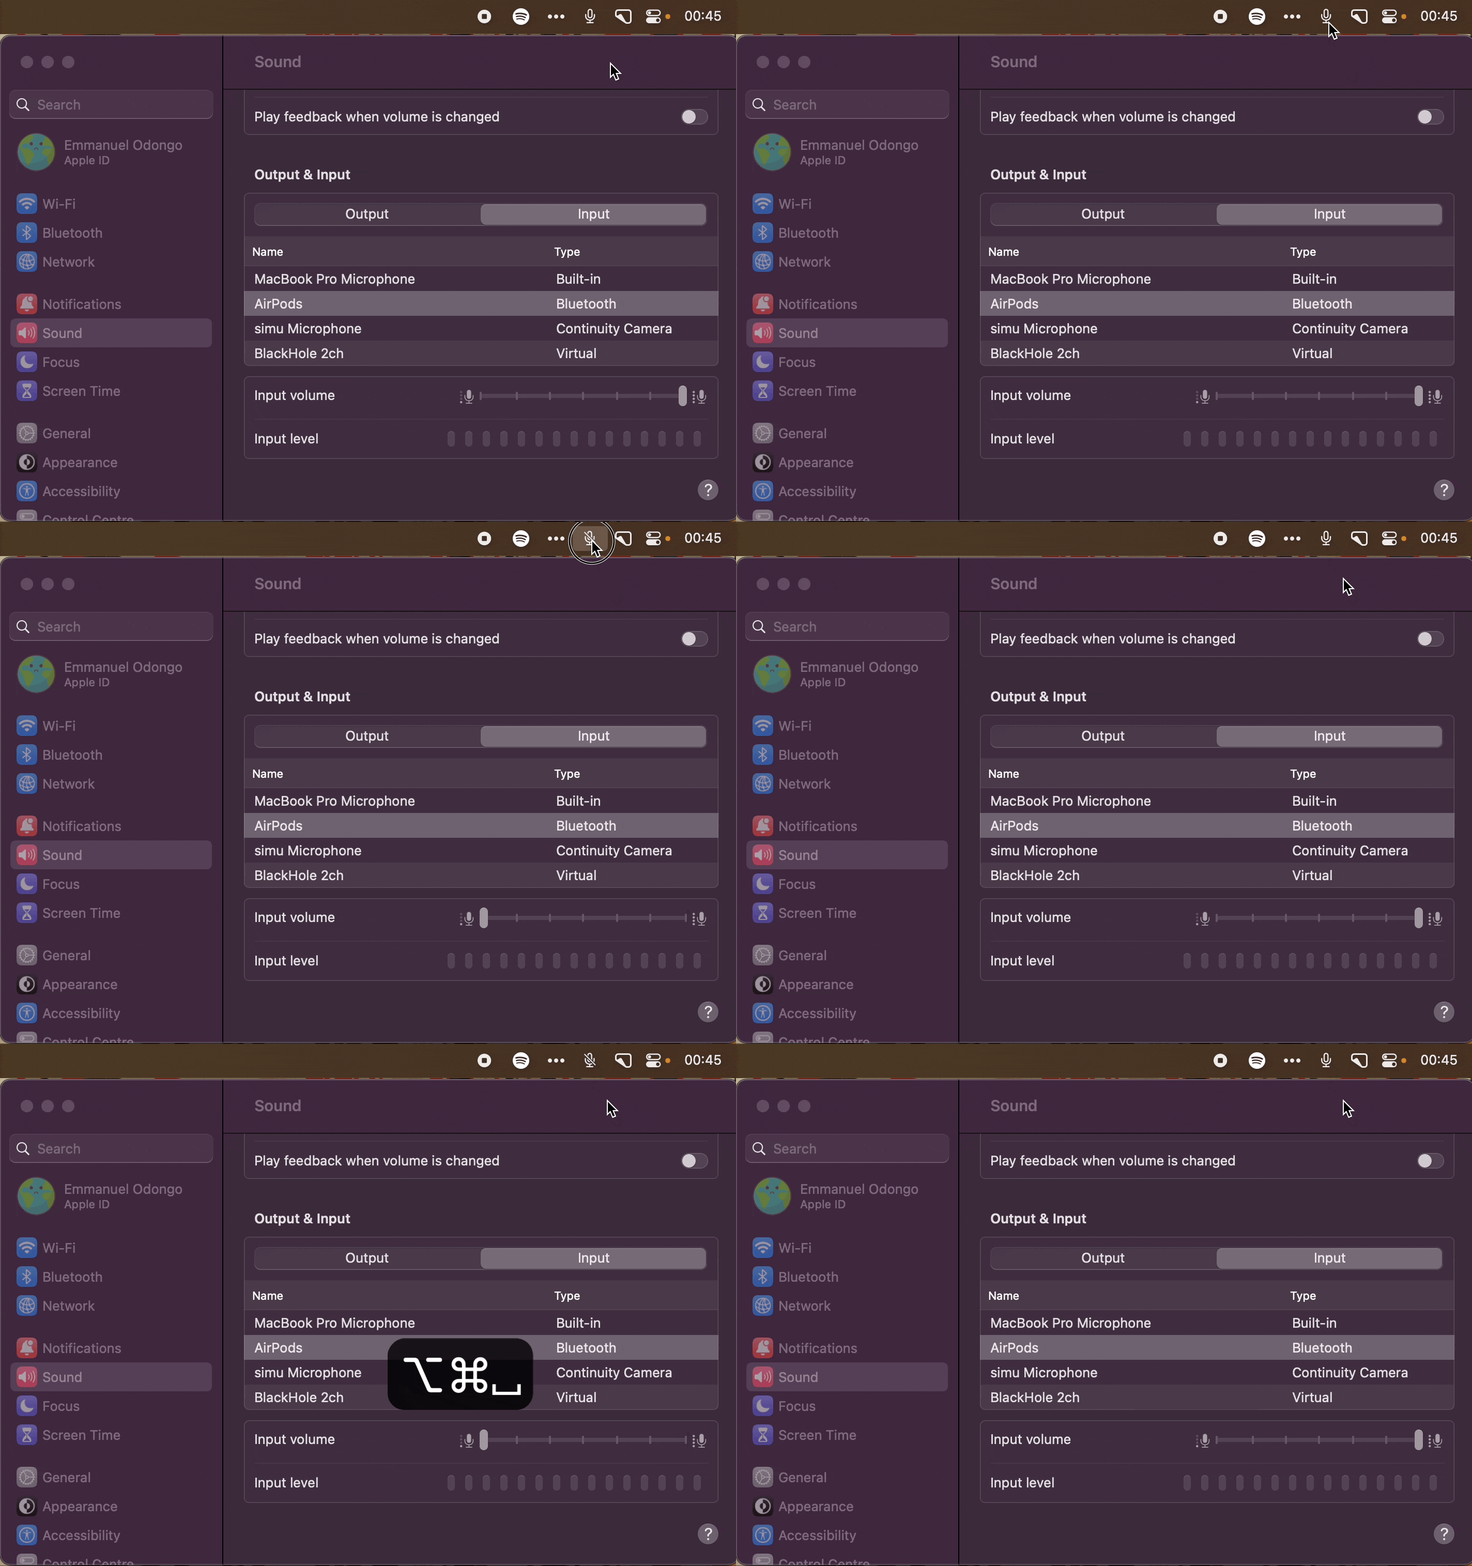
After clearing my notifications hundreds of times over several months, I'd finally had enough. I set out to find a less mildly annoying solution. My initial research uncovered this Raycast plugin3. It met the 2 hard requirements that I wanted in a solution:
However, I experienced one slightly jarring issue whenever I toggled the microphone using a keyboard shortcut: the microphone icon would briefly disappear along with all menubar icons to its left. They would then all rerender.
This was enough to push me to look into writing my own app4 to toggle the microphone without causing the menubar to flash. It also doubled as a nice first project to learn Swift. The source code is available in all its warts and glory.
I plan to add more features to make the app more usable, such as:
There is a Raycast script command containing a near identical script. ↩︎
Given I'm an avid Raycast user, I was absolutely thrilled to discover this plugin just a day after it was published. ↩︎
As is the way with life, while doing some research for this article, I came across a number of free menu bar apps that cover the exact same functionality (and more) such as Mic Müter and Mute Key 🙃 ↩︎
One common way of handling authentication and authorisation in web-based systems is to have a client send their login credentials to the backend, which generates and returns a signed JWT linked to an identity. The client can then access or modify protected resources by attaching the JWT to the request. Before handling the request, the backend verifies the JWT's authenticity.
JWTs can be signed and verified using a secret. In this case, the same secret is used for signing and verifying. This is a reasonable approach in a monolithic architecture, since only one program has access to the secret.
// GENERATING A JWT USING A SECRET
import { randomUUID } from "crypto";
import * as jwt from "jsonwebtoken";
const SECRET = "123";
const user = {
id: randomUUID(),
};
const claimSet = {
aud: "Audience",
iss: "Issuer",
jti: randomUUID(),
sub: user.id,
};
const token = jwt.sign(
claimSet,
SECRET,
{
algorithm: "HS256",
expiresIn: "20 minutes",
}
);
console.log(token); // => eyJhbGciOiJIUzI1NiIsInR5cCI6IkpXVCJ9.eyJhdWQiOiJBdWRpZW5jZSIsImlzcyI6Iklzc3VlciIsImp0aSI6ImY1NGEzOGVmLTQ4NzctNGJmYy05N2RmLWFkYzFiNjQxNzU5YiIsInN1YiI6IjRlNzQ5ZTAwLTE1NWItNGNlNi1iYWQyLWExOTE5MWM0MmQ2NyIsImlhdCI6MTY3OTc3OTUwOSwiZXhwIjoxNjc5NzgwNzA5fQ.X94g8OkecnaOYLMuVFmy_hcjJ7nvBMhDEvrUpTvvxQE
// VERIFYING A JWT USING A SECRET
import { verify } from "jsonwebtoken";
const SECRET = "123";
verify(token, SECRET);
An alternative way of signing and verifying JWTs is by using key pairs. This involves signing the JWT using a private key and subsequently verifying it using the corresponding public key.
In a service-oriented architecture, the borders between services are generally drawn in a way that separates concerns. That separation should go hand in hand with the principle of least privilege. From the point of view of a service, it should have the least permissions needed for it to perform its duties.
More concretely, only the service responsible for generating JWTs should have access to the private key. This means that other services are unable to generate valid JWTs; all they can do is use the public key to verify a JWT they have received.
// GENERATING A JWT USING A PRIVATE KEY
import { randomUUID } from "crypto";
import { readFileSync } from "fs";
import { sign } from "jsonwebtoken";
const PRIVATE_KEY = readFileSync("./privateKey.pem");
const user = {
id: randomUUID(),
};
const claimSet = {
aud: "Audience",
iss: "Issuer",
jti: randomUUID(),
sub: user.id,
};
const token = sign(
claimSet,
PRIVATE_KEY,
{
algorithm: "ES512",
expiresIn: "20 minutes",
}
);
console.log(token); // => eyJhbGciOiJFUzUxMiIsInR5cCI6IkpXVCJ9.eyJhdWQiOiJBdWRpZW5jZSIsImlzcyI6Iklzc3VlciIsImp0aSI6ImE0NzVhYTU5LTIwMGQtNDlkOS1iODVmLTJkZmExM2Q3NTMyMSIsInN1YiI6ImE2YWFkNWY0LTE3NjctNDUwYy04MWNjLTIyMmI3OWI1NzNiYSIsImlhdCI6MTY3OTc4MDI3NiwiZXhwIjoxNjc5NzgxNDc2fQ.AIuJlLZCvpSWLh_ez6pBVX4lcrVbOiUc2NuwCNiw5ms4ELAZRvQFT5-UlKC-PBWXWzWpHh7eO-WWmfOgRnObk_vpAYAo5Wu8Wu-YaL2lBLvaQp2oG5YnXJ9S1kCKGF9i0UloUeYCK6-bdhRvh-rrOqpCOPepWEiQDiWgEzAdPOl75pY4
// VERIFYING A JWT USING A PUBLIC KEY
import { readFileSync } from "fs";
import { verify } from "jsonwebtoken";
const PUBLIC_KEY = readFileSync("./publicKey.pem");
verify(token, PUBLIC_KEY);
A key pair can be generated from the terminal using openssl
.
Before we start generating a key pair, we need to know which curve openssl
should use. The ES512
algorithm used in the previous code snippet corresponds to the secp512r1
curve[1].
We can generate the private key by running the following command:
openssl ecparam -name secp521r1 -genkey -out privateKey.pem
The private key is then used to generate the public key[2] using the command below:
openssl ec -in privateKey.pem -pubout -out publicKey.pem
[1]: If you wanted to use a different algorithm, say ES256
, but provided the key generated above, jsonwebtoken
would throw a helpful error message specifying which curve it expects.
import { randomUUID } from "crypto";
import { readFileSync } from "fs";
import { sign } from "jsonwebtoken";
const PRIVATE_KEY = readFileSync("./privateKey.pem");
const user = {
id: randomUUID(),
};
const claimSet = {
aud: "Audience",
iss: "Issuer",
jti: randomUUID(),
sub: user.id,
};
const token = sign(
claimSet,
PRIVATE_KEY,
{
algorithm: "ES256",
expiresIn: "20 minutes",
}
); // => throws `"alg" parameter "ES256" requires curve "prime256v1".`
Generating a new key pair with the expected curve (prime256v1
instead of secp521r1
) should resolve the error.
[2]: The node crypto
module can generate a public key based off of the private key. So if the service issuing tokens needed to verify them too, we would only need to configure the private key:
import { createPublicKey } from "crypto";
import { readFileSync } from "fs";
import { verify } from "jsonwebtoken";
const PRIVATE_KEY = readFileSync("./privateKey.pem");
const PUBLIC_KEY = createPublicKey(PRIVATE_KEY)
.export({ format: "pem", type: "spki" });
verify(token, PUBLIC_KEY);
I recently came across a situation where I needed to stream realtime updates from server to client. After some research, I opted not to go with the defacto solution of web sockets, and instead went with the equally well-supported approach of Server Sent Events (SSE).
SSE is a one-directional communication channel with an impressively simple browser API:
// establish connection
const eventSource = new EventSource(url);
// listen and handle events
eventSource.addEventListener(eventName, eventHandler);
// close connection
eventSource.close();
If the connection is interrupted without explicitly being closed by the client, the browser will automatically attempt to reestablish the connection.
On the server side, I used the Fastify SSE Plugin which supports using an event emitter to handle the firing of events.
Here's a simplified version of a GET /rates
endpoint used to subscribe to receive exchange rates:
import fastify from "fastify";
import { FastifySSEPlugin } from "fastify-sse-v2";
import { EventEmitter, on } from "events";
const eventEmitter = new EventEmitter();
const server = fastify();
server.register(FastifySSEPlugin);
server.get("/rates", (_request, reply) => {
reply.sse(
(async function* () {
for await (const [payload] of on(eventEmitter, "ratesUpdated")) {
yield {
data: JSON.stringify(payload),
event: "update",
};
}
})()
);
});
The async generator – async function* ()
– is what allows us to listen to events fired by the event emitter.
It's a good idea to use an abort controller to clean up when the connection drops. Here's what the code now looks like:
import fastify from "fastify";
import { FastifySSEPlugin } from "fastify-sse-v2";
import { EventEmitter, on } from "events";
const eventEmitter = new EventEmitter();
const server = fastify();
server.register(FastifySSEPlugin);
server.get("/rates", (request, reply) => {
const abortController = new AbortController();
request.socket.on("close", () => {
abortController.abort();
});
reply.sse(
(async function* () {
for await (const [payload] of on(eventEmitter, "ratesUpdated", { signal: abortController.signal })) {
yield {
data: JSON.stringify(payload),
event: "update",
};
}
})()
);
});
We can extract the async generator into a reusable and testable unit:
import { EventEmitter, on } from "events";
import { EventMessage } from "fastify-sse-v2";
interface Params {
abortController: AbortController;
eventEmitter: EventEmitter;
eventName: string;
}
function makeEventListenerGenerator({
abortController,
eventEmitter,
eventName,
}: Params) {
return async function* (): AsyncGenerator<EventMessage> {
for await (const [data] of on(
eventEmitter,
eventName,
{ signal: abortController.signal }
)) {
yield {
data: JSON.stringify(data),
event: "update",
};
}
};
}
This function can then be used in the GET /rates
handler as follows:
reply.sse(
makeEventListenerGenerator({
abortController,
eventEmitter,
eventName: "ratesUpdated",
})()
);
Before we can test our makeEventListenerGenerator
function, it's important to understand that it returns an async generator function. Calling this function returns an async iterator: an object that can generate a sequence of values asynchronously.
The on
function, which we imported from node's events
module, is roughly equivalent to the browser's addEventListener
method. We can subscribe to events that are fired by the event emitter using the on
function.
Firing events is done using the event emitter's emit
method.
Here's the whole flow of publishing and consuming events:
import { EventEmitter, on } from "events";
const eventEmitter = new EventEmitter();
const iterator = on(eventEmitter, "ping");
eventEmitter.emit("ping", { key: "value" });
await iterator.next(); // => { value: [{ key: "value" }], done: false }
Armed with this knowledge, we can now unit test the makeEventListenerGenerator
function:
import { EventEmitter } from "events";
import { describe, expect, test } from "vitest";
import { makeEventListenerGenerator } from "./makeEventListenerGenerator";
describe("makeEventListenerGenerator", () => {
test("iterates over emitted events", () => {
const abortController = new AbortController();
const eventEmitter = new EventEmitter();
const eventName = "ratesUpdated";
const eventPayload = [{ from: "USD", to: "EUR", rate: 0.94 }];
const eventIterator = makeEventListenerGenerator({
abortController,
eventEmitter,
eventName,
})();
(async () => {
expect(await eventIterator.next()).toHaveProperty("value", {
data: JSON.stringify(eventPayload),
event: "update",
});
})();
eventEmitter.emit(eventName, eventPayload);
});
});
With that, our unit test is complete and we can give ourselves a pat on the back. But before I close off, there is one final key point that I feel needs to be covered.
Typically, unit tests take the form: arrange → act → assert . If we read the test we just wrote from top to bottom, it seems like we are doing arrange → act → assert → act . What gives?
The last part of our test that runs is not the eventEmitter.emit(...)
line, but rather our assertion: expect(...).toHaveProperty(...)
. This is because, as soon as the await
keyword is encountered, the evaluation of the expression to its right – eventIterator.next()
– will be pushed onto the Microtask Queue. The main thread continues executing to the end, and only then can the result of the evaluated expression be processed.
The 2 code snippets below should help clarify this:
console.log("top");
(() => {
console.log("middle");
})();
console.log("bottom");
// logs "top", "middle", "bottom"
console.log("top");
(async () => {
console.log(await "middle");
})();
console.log("bottom");
// logs "top", "bottom", "middle"
Great care needs to be taken, not to be caught unawares by this behaviour. The following test passes even though the assertions are clearly wrong:
import { EventEmitter } from "events";
import { describe, expect, test } from "vitest";
import { makeEventListenerGenerator } from "./makeEventListenerGenerator";
describe("makeEventListenerGenerator", () => {
test("iterates over emitted events", () => {
const abortController = new AbortController();
const eventEmitter = new EventEmitter();
const eventName = "ratesUpdated";
const eventPayload = [{ from: "USD", to: "EUR", rate: 0.94 }];
const eventIterator = makeEventListenerGenerator({
abortController,
eventEmitter,
eventName,
})();
eventEmitter.emit(eventName, eventPayload);
(async () => {
expect(await eventIterator.next()).toHaveProperty("value", "false positive");
expect(false).toBe(true);
})();
});
});
Encoding a file to base64 can be done using the FileReader
API as shown below:
const encodeBase64 = (file: File): Promise<string> =>
new Promise((resolve, reject) => {
const reader = new FileReader();
reader.readAsDataURL(file);
reader.onload = () => resolve(reader.result as string);
reader.onerror = (error) => reject(error);
});
After encoding the file, the returned base64 string can be saved locally through local storage or any storage APIs available at runtime. Note that it is possible to skip the base64 encoding and instead store blobs via IndexedDB.
If you do opt to use base64 encoding, it may be useful to save the mimetype of the file and, if it's relevant, the file name too. We'll see why once we need to decode the base64 string.
Decoding can be done by fetching the base64 string — it's a data URL — and converting it to a blob, then to a File
. In the code snippet below, the name
is the name of the file and the type
is its mimetype.
const decodeBase64 = ({
base64,
name,
type,
}: {
base64: string;
name: string;
type: string;
}): Promise<File> =>
fetch(base64)
.then((response) => response.blob())
.then((blob) => new File([blob], name, { type }));
Base64 encoding a file in the browser and storing the resulting string locally makes it possible to keep track of what files have been input by the user. If the base64 string was persisted, it can be decoded to recover the file contents, even after a page refresh.
TypeScript offers the ability to pepper one's code with type annotations, allowing the compiler to perform type checks and the language server to provide code completion. These all add up to an improved developer experience, but much of the benefits are thrown out the window once the code is shipped and running out in the wild. While TypeScript may encourage writing safer code that handles edge cases better, there are times when the need to perform runtime validations of values with non-trivial structures arises. This is typically the case when handling input from external sources, be that receiving a response from an API or from a user filling in a form.
This article will focus on form validation in React, but the same concepts can be applied to other frameworks (or lack thereof), and even to other use cases such as validating API responses or performing crude pattern matching.
Consider a form that asks a user for the following information:
In TypeScript we may define a type that expresses the valid values of our form as follows:
type TForm = {
firstName: string;
email: string;
favouriteNumber: number;
favouriteColour: "blue" | "not blue";
}
For the time being, let's gloss over the fact that the type string
is not nearly restrictive enough for an email. We may be tempted to say the same thing about the first name, but names are not as simple to categorise as societal norms may suggest.
Some form libraries such as react-use-form-state
can make use of the above type to make type inferences, which is really useful. In the below example, formState.values
not only mirrors the shape of TForm
, but also infers the type of each field:
const [formState] = useFormState<TForm>();
formState.values.favouriteNumber // infers the type `number`
So what happens when the user fills in the form and clicks the submit button? Ideally, we would validate the form data first, informing the user if anything needs to be corrected. Unfortunately, TypeScript isn't going to be of much help here.
We'll need to write some validation checks, which usually end up more or less expressing the TypeScript type, except in the form of code. This kind of repetition may seem trivial when the TypeScript types match up with the built in JavaScript types; this is the case with string
and number
. But once we start dealing with more complex types, such as a string that matches a regex pattern or an array of predefined strings, the checks we need to perform begin to resemble the TypeScript types less and less.
A myriad of switch or if-else blocks seems like the way forward, but to make life easier for ourselves, we can make use of a validation library such as zod
, to reduce cognitive overhead of defining these validation checks. The zod
schema for the same form is shown below:
import * as z from "zod"
const formSchema = z.object({
firstName: z.string(),
email: z.string().email(),
favouriteNumber: z.number(),
favouriteColour: z.enum(["blue", "not blue"]),
})
This looks reasonably nice. formSchema
resembles TForm
pretty closely. zod
even provides a convenient email()
method that saves us the trouble of searching for an email regex to use. In our submit handler, we can check to see if formState.values
matches the schema we defined using zod
.
const handleSubmit: React.FormEventHandler = (event) => {
event.preventDefault()
try {
formSchema.parse(formState.values)
} catch(error) {
if (error instanceof z.ZodError) {
/* map zod errors to the appropriate form fields */
return
}
}
/* submit the form to the backend */
}
To recap, we have TForm
— a type that we have defined in TypeScript — which gives us the advantage of type inference and code completion. We also have formSchema
— a "type" that we have defined using zod
— which allows us to conveniently validate the form at runtime and comes with error message built in. This is what they look like next to each other:
type TForm = {
firstName: string;
email: string;
favouriteNumber: number;
favouriteColour: "blue" | "not blue";
}
const formSchema = z.object({
firstName: z.string(),
email: z.string().email(),
favouriteNumber: z.number(),
favouriteColour: z.enum(["blue", "not blue"]),
})
The similarity is glaringly obvious. While this is a step in the right direction, especially considering that the alternative would probably be much less concise and involve littering our code with if statements, something feels off (if it doesn't, I'm gently hinting that it should). Why do we need write out the "same type" twice using different syntaxes? Wouldn't it be great if we only had to write the "type" a single time using one approach and have the other inferred from the first?
I don't know of any tool that would allow us to pass a TypeScript type and get back a zod
schema. Such a tool would need a way for us to tell it that the email
field should be validated against a regex pattern, perhaps through a magic comment. This is likely possible to implement as an extension to an IDE, but as it turns out, if we reverse our thinking and instead try and infer the TypeScript type from the zod
schema, then the problem has already been solved for us through zod
's infer
method.
const formSchema = z.object({
firstName: z.string(),
email: z.string().email(),
favouriteNumber: z.number(),
favouriteColour: z.enum(["blue", "not blue"]),
})
type TForm = z.infer<typeof formSchema>
We now have a single source of truth that defines what our form should look like. The zod
schema is useful for validating the form data, and we still get to keep all the benefits of having defined the form's type in TypeScript.
We end up with a form component that looks as follows:
import React, { FC, FormEventHandler } from "react"
import { useFormState } from "react-use-form-state"
import * as z from "zod"
const formSchema = z.object({
firstName: z.string(),
email: z.string().email(),
favouriteNumber: z.number(),
favouriteColour: z.enum(["blue", "not blue"]),
})
type TForm = z.infer<typeof formSchema>
const Form: FC = () => {
const [formState, { number, text }] = useFormState<TForm>()
const handleErrors = (errors: { [k: string]: string[] }): void => {
const invalidFields = Object.keys(errors) as Array<keyof TForm>
invalidFields.forEach(field =>
formState.setFieldError(field, errors[field].join("; "))
)
const validFields = (Object.keys(formState.values) as Array<keyof TForm>)
.filter(field => !invalidFields.includes(field))
validFields.forEach(field =>
formState.setFieldError(field, null)
)
}
const handleSubmit: FormEventHandler = event => {
event.preventDefault()
try {
formSchema.parse({
...formState.values,
favouriteNumber: parseInt(formState.values.favouriteNumber),
})
handleErrors({})
} catch (error) {
if (error instanceof z.ZodError) {
handleErrors(error.flatten().fieldErrors)
return
}
}
/* submit the form to the backend */
}
const validateField = (field: keyof TForm) =>
(value: unknown): string => {
const parsedResult = formSchema
.pick({ [field]: true })
.safeParse({ [field]: value })
return !parsedResult.success
? parsedResult.error.errors[0].message
: ""
}
return (
<form onSubmit={handleSubmit}>
<div>
<label>
First name
<input
{...text({
name: "firstName",
validate: validateField("firstName"),
})}
/>
</label>
<p>{formState.errors.firstName}</p>
</div>
<div>
<label>
Email
<input
{...text({
name: "email",
validate: validateField("email"),
})}
/>
</label>
<p>{formState.errors.email}</p>
</div>
<div>
<label>
Favourite number
<input
{...number({
name: "favouriteNumber",
validate: value => {
return validateField("favouriteNumber")(parseInt(value))
},
})}
/>
</label>
<p>{formState.errors.favouriteNumber}</p>
</div>
<div>
<label>
Favourite colour
<input
{...text({
name: "favouriteColour",
validate: validateField("favouriteColour"),
})}
/>
</label>
<p>{formState.errors.favouriteColour}</p>
</div>
<div>
<button type="submit">Submit</button>
</div>
</form>
)
}
export default Form
A few noteworthy amendments have been added to the form that were not previously discussed. The first is that we now have a handleErrors
function that controls which errors are displayed on the screen. The error messages shown are the defaults that are shipped with zod
. Although we use the defaults here, zod
provides a way to specify custom error messages should we wish to go that route. The handleErrors
function is called in our submit handler, and conveniently allows us to clear all the errors by passing an empty object as its argument.
const handleErrors = (errors: { [k: string]: string[] }): void => {
const invalidFields = Object.keys(errors) as Array<keyof TForm>
invalidFields.forEach(field =>
formState.setFieldError(field, errors[field].join("; "))
)
const validFields = (Object.keys(formState.values) as Array<keyof TForm>)
.filter(field => !invalidFields.includes(field))
validFields.forEach(field =>
formState.setFieldError(field, null)
)
}
The formState
object returned by the useFormState
hook has its own built-in error messages. These error messages are inferred from the TypeScript type that we provide when we call useFormState<TForm>
. This is not ideal for 2 reasons. Firstly, the wording will be different from zod
's error messages. Secondly, zod
has stricter checks (remember the email regex?). As an example, formState.errors.email
will be empty even for an invalid email. To get around this issue we create a validateField
function that makes the form state use zod
's validation checks as well as its error messages. We also use two new methods provided by zod
: pick
and safeParse
. pick
allows us to select only the fields we are interested in based on an existing schema. safeParse
like parse
, compares the values passed to it against the schema. The difference being that safeParse
does not throw when validation errors occur.
const validateField = (field: keyof TForm) =>
(value: unknown): string => {
const parsedResult = formSchema
.pick({ [field]: true })
.safeParse({ [field]: value })
return !parsedResult.success
? parsedResult.error.errors[0].message
: ""
}
In addition to the formState
object, useFormState
also returns some input functions that apply the HTML type
and name
attributes. These input functions accept a validate function that returns the error message if any. This is where we'll plug in our validateField
function to ensure that we are using the validation rules and error messages provided by zod
instead of those provided by react-use-form-state
.
<input
{...text({
name: "email",
validate: validateField("email"),
})}
/>
The above snippet is roughly equivalent to the following:
<input
name="email"
onChange={(event): void => {
formState.setFieldError(
"email",
validateField("email")(event.currentTarget.value),
)
}}
type="text"
/>
Once the custom validation rules are in place, we need a way of displaying the error messages. We can lightly modify the JSX so that error messages are displayed next to their corresponding field.
<label>
Email
<input
{...text({
name: "email",
validate: validateField("email"),
})}
/>
</label>
<p>{formState.errors.email}</p>
Finally, we make sure to call parseInt
whenever we want to check if the value of favouriteNumber
matches the schema. This is unavoidable since even though the field has an attribute of type="number"
, which is implied by calling {...number({ // ... })}
, the browser will always return a string value. A string would automatically fail to meet the criteria defined in our schema: z.number()
.
const handleSubmit: FormEventHandler = event => {
/* ... */
formSchema.parse({
...formState.values,
favouriteNumber: parseInt(formState.values.favouriteNumber),
})
/* ... */
}
return (
{/* ... */}
<label>
Favourite number
<input
{...number({
name: "favouriteNumber",
validate: value => {
return validateField("favouriteNumber")(parseInt(value))
},
})}
/>
</label>
{/* ... */}
)
Here is a running example of the form described in this post.
Assume that you had a repo that was hosted on github, and you decided that for some reason you would like to have a copy of your repo on gitlab as well. Perhaps the obvious solution would be to add another remote to your git config.
$ git remote add gitlab git@gitlab.com/username/my-repo.git
Pushing to both repos would then be achieved as follows:
$ git push origin main
$ git push gitlab main
Remembering to run both these commands every time you wanted to push your changes seems like a tall ask. The good new is that you can get the desired behaviour with just a single command that's likely already part of your muscle-memory:
$ git push origin main
A good place to start implementing our solution to this problem would be to check for existing remotes.
$ git remote -v
The above command lists out our fetch and push remotes, which may look something like this:
origin git@github.com:username/my-repo.git (fetch)
origin git@github.com:username/my-repo.git (push)
For the superstitious amongst us, you can optionally clear and re-add the origin
remote.
$ git remote remove origin
$ git remote add origin git@github.com:username/my-repo.git
We now have one push and one pull URL. The solution to our problem lies in setting a second push URL as shown:
$ git remote set-url --add --push origin git@gitlab.com:username/my-repo.git
To wrap up, we then set the upstream branch of our choosing (main
in this case).
$ git fetch origin main
$ git branch --set-upstream-to origin/main
From now on, whenever we run git push origin main
, git will push our changes to both remote repositories (github and gitlab). Fetching or pulling changes from origin will always refer to just the one repo (github).
As a final touch, we can give both of our repo hosts a unique name in case we ever need to explicitly push or fetch from a particular one.
$ git remote add github git@github.com:username/my-repo.git
$ git remote add gitlab git@gitlab.com:username/my-repo.git
Once this is done, listing our remotes with git remote -v
gives the following output:
github git@github.com:username/my-repo.git (fetch)
github git@github.com:username/my-repo.git (push)
gitlab git@gitlab.com:username/my-repo.git (fetch)
gitlab git@gitlab.com:username/my-repo.git (push)
origin git@github.com:username/my-repo.git (fetch)
origin git@github.com:username/my-repo.git (push)
origin git@gitlab.com:username/my-repo.git (push)
A CSS lock is an interpolating function used to transition a numerical value in CSS between two breakpoints. This is typically done to make web pages responsive, although, it could also be used in more creative ways, such as, in art direction.
Suppose we wanted to change the font size of given heading on a web page at given breakpoints in the viewport width. We may end up with the following styles:
h2 {
font-size: 2rem;
@media (min-width: 400px) {
font-size: 3rem;
}
@media (min-width: 1000px) {
font-size: 4.5rem;
}
}
The code snippet shown above utilises a step-like approach to responsiveness. The font-size increases in steps as the viewport becomes wider. The font size is 2rem for viewports that are narrower than 400px, and 4.5rem for viewports wider than 1000px. For the remaining viewport widths, the font size is 3rem.
The is no particular reason for the sudden jump in font size around the 400px and 1000px marks. Certainly there is no satisfactory explanation why a user whose viewport is 399px wide should have a such a significantly smaller font than if their viewport was 401px wide.
The step-like behaviour that our heading's font size now exhibits is purely an artefact of the way in which we have implemented its responsiveness.
Perhaps, a more sensible way of going about this, would be to let the font size retain its minimum and maximum values, and transition between these two values. This will likely be more consistent with the overall design of the page.
A CSS lock does just that. It sets a given CSS property to a one value below a lower breakpoint, and to a second value above an upper breakpoint. In between breakpoints, the CSS property's value is transitioned from its value at one breakpoint to its value at the other breakpoint.
h2 {
font-size: 2rem;
@media (min-width: 400px) {
font-size: calc(/* some formula */);
}
@media (min-width: 1000px) {
font-size: 4.5rem;
}
}
Without the help of JavaScript, the only way to achieve such a transition is to make use of the CSS calc()
function. While this article doesn't go into how the formula that we shall use in the calc()
function was derived, Florens Verschelde's article on CSS locks provides an in-depth explanation of the math, for those so inclined.
h2 {
font-size: 2rem;
@media (min-width: 400px) {
font-size: calc(2rem + (4.5 - 2) * ((100vw - 400px) / (1000 - 400)));
}
@media (min-width: 1000px) {
font-size: 4.5rem;
}
}
If everything worked correctly, we can expect the font size to be just above 2rem when the viewport is slightly over 400px wide. If we test it out in a browser, this is actually the case.
Conversely, for a viewport width just below 100px, we expect a font size that is slightly smaller than 4.5rem. This is sadly not the case. Around the 1000px mark, the font size jumps from around 2.155rem to 4.5rem. We expected the value returned by our calc()
function when the viewport width was just below 100px to be approximately 4.5rem, but it returned a value that was just barely greater that 2rem.
The reason for the strange behaviour of our calc()
function is the mixing of units. Currently, our formula uses px
, rem
and vw
units. Assuming the base font size of the document was not changed, 1rem corresponds to 16px in most browsers. We could replace all the rem
based values with their equivalent px
based values.
h2 {
font-size: 2rem;
@media (min-width: 400px) {
font-size: calc(32px + (72 - 32) * ((100vw - 400px) / (1000 - 400)));
}
@media (min-width: 1000px) {
font-size: 4.5rem;
}
}
Alternatively we could replace the px
based values with their equivalent rem
based values.
h2 {
font-size: 2rem;
@media (min-width: 400px) {
font-size: calc(2rem + (4.5 - 2) * ((100vw - 25rem) / (62.5 - 25)));
}
@media (min-width: 1000px) {
font-size: 4.5rem;
}
}
Writing out the formula in calc()
function by hand can be cumbersome. We could make use of a CSS preprocessor like sass to write a reusable mixin that generates the formula for us. Since the formula uses
the other two values of the font size found outside the calc()
function — 2rem and 4.5rem — the entire snippet above can be encapsulated in a mixin.
@mixin css-lock($prop, $unit, $min-size, $max-size, $min-width, $max-width) {
#{$prop}: #{$min-size}#{$unit};
@media (min-width: #{$min-width}#{$unit}) {
#{$prop}: calc(#{$min-size}#{$unit} + (#{$max-size} - #{$min-size}) * ((100vw - #{$min-width}#{$unit}) / (# {$max-width} - #{$min-width})));
}
@media (min-width: #{$max-width}#{$unit}) {
#{$prop}: #{$max-size}#{$unit};
}
}
h2 {
@include css-lock('font-size', 'rem', 2, 4.5, 25, 62.5);
}
We use the mixin by using the @include
at-rule. The mixin takes six arguments: a property name, a unit, 2 property values and 2 breakpoints. It is important to remember that the property values and breakpoints must use the same unit; otherwise, the transition will be disjointed, as previously demonstrated.
While it is quite reasonable to expect various CSS properties to use different units in a given project — for instance, px
for margins and paddings, and rem
for font sizes — it is highly likely that the breakpoints within a codebase all use the same units. We can take advantage of this to improve the ergonomics of our mixin.
@function convert-from-px($unit, $value) {
@if ($unit == 'rem') {
@return $value / 16;
} @else if ($unit == 'px') {
@return $value;
}
}
@mixin css-lock($prop, $unit, $min-size, $max-size, $min-width, $max-width) {
$min-width: convert-from-px($unit, $min-width);
$max-width: convert-from-px($unit, $max-width);
#{$prop}: #{$min-size}#{$unit};
@media (min-width: #{$min-width}#{$unit}) {
#{$prop}: calc(#{$min-size}#{$unit} + (#{$max-size} - #{$min-size}) * ((100vw - #{$min-width}#{$unit}) / (# {$max-width} - #{$min-width})));
}
@media (min-width: #{$max-width}#{$unit}) {
#{$prop}: #{$max-size}#{$unit};
}
}
h2 {
@include css-lock('font-size', 'rem', 2, 4.5, 400, 1000);
@include css-lock('margin-bottom', 'px', 30, 45, 400, 1000);
}
In the code snippet above, it is assumed that the breakpoint values are always given in pixels. By using an @function
at-rule, we can automatically convert the breakpoint values to the relevant units each time the mixin is called. This means that we don't have to manually perform any conversions if the property in our mixin uses a unit other than px
.
The snippet below shows the same implementation in stylus:
convert-from-px($unit, $value)
if $unit == rem
$value / 16
else if $unit == px
$value
css-lock($property, $unit, $min-size, $max-size, $min-width, $max-width)
$min-width = convert-from-px($unit, $min-width)
$max-width = convert-from-px($unit, $max-width)
{$property} "%s%s" % ($min-size $unit)
@media (min-width "%s%s" % ($min-width $unit))
{$property} "calc(%s%s + (%s - %s) * ((100vw - %s%s) / (%s - %s)))" % ($min-size $unit $max-size $min-size $min-width $unit $max-width $min-width)
@media (min-width "%s%s" % ($max-width $unit))
{$property} "%s%s" % ($max-size $unit)
h2
css-lock(font-size, rem, 2, 4.5, 400, 1000)
css-lock(margin-bottom, px, 30, 45, 400, 1000)
The first step in customising the PowerShell prompt is setting up a profile. This is a file that will be loaded every time you open a new PowerShell console. For those familiar with bash, the concept is similar to a .bashrc
file.
Before creating a new profile, it is worthwhile checking if one already exists. This can be confirmed by running the following command:
Echo $PROFILE
If the above command outputs a path, then we can skip the creation of a profile. If the output is empty, then we will have to create a new profile by opening up a PowerShell console and executing the following command:
New-Item -ItemType File -Path $PROFILE -Force
This will create a profile and save it to the following location: C:\Users\<user>\Documents\WindowsPowerShell\Microsoft.PowerShell_profile.ps1
. This path will also be saved to the $PROFILE
environment variable.
The default prompt in Powershell shows the current working directory and not much else. It looks something like this:
PS C:currentworkingdirectory>
One issue with such a prompt occurs that when the current working directory is deeply nested and/or contains long folder names. This can make the prompt stretch to cover the full width of the window or screen. Having to input a command in the shell and have it overflow onto the next line almost immediately is less than ideal.
There are a few ways we could go about dealing with long working directories. We could truncate part of the path or remove the current working directory from the prompt altogether. These solutions might be more compelling for those who find themselves working with deeply nested directories very often.
However, to provide a more consistent experience, we could leave the path in the prompt as is. Instead we will solve the problem indirectly, by moving the cursor one line down.
Having a basic idea of what we want our prompt to look like, we can fire up our editor of choice and edit our profile. If we define a Prompt
function, it will be ran when PowerShell is generating the prompt.
function Prompt {
Write-Host "[$($ExecutionContext.SessionState.Path.CurrentLocation)]" -f DarkCyan
return "> "
}
After saving your changes, open a new PowerShell console (this can be done by running the command powershell
in a console that is already open) to view the changes. Our prompt should now appear as follows:
[C:currentworkingdirectory]
>
Moving the cursor onto its own line means that we no longer have to deal with searching for the cursor as we switch between projects or change directories within a single project. The position of the cursor is now always consistent, wether or not the current working directory is long or short.
In addition to this, it is far less likely that a command we enter into the console will break onto the next line since we have freed up a significant amount of horizontal space.
We could make a few more changes to our prompt to make it, in my opinion, nicer to work with.
First we will add the name of the current user to the prompt:
function Prompt {
Write-Host "[$($ExecutionContext.SessionState.Path.CurrentLocation)]" -f DarkCyan
Write-Host "$env:username>" -n -f DarkGreen
return " "
}
Next we will replace the angled bracket in our prompt with a fancier arrow:
function Prompt {
Write-Host "[$($ExecutionContext.SessionState.Path.CurrentLocation)]" -f DarkCyan
Write-Host "$env:username" -n -f DarkGreen
Write-Host " $([char]0x2192)" -n -f DarkGreen
return " "
}
For the sake of convenience, let's split the above code into functions:
function Write-Directory {
Write-Host "[$($ExecutionContext.SessionState.Path.CurrentLocation)]" -f DarkCyan
}
function Write-UserName {
Write-Host "$env:username" -n -f DarkGreen
}
function Write-Arrow {
Write-Host " $([char]0x2192)" -n -f DarkGreen
}
function Prompt {
Write-Directory
Write-UserName
Write-Arrow
return " "
}
Our prompt now looks like this:
[C:currentworkingdirectory]
CurrentUser →
The final adjustment we will make is adding the current git branch to the prompt. We will need a function that gets the current git branch and displays it in the prompt if the current working directory is part of a git repository.
The solution to this comes courtesy of StackOverflow. It uses different colours to represent different branches (i.e. red for detached, yellow for main, dark green for everything else).
We can make the following modification to our profile:
function Write-GitBranchName {
try {
$branch = git rev-parse --abbrev-ref HEAD
if ($branch -eq "HEAD") {
$sha = git rev-parse --short HEAD
Write-Host "($sha)" -n -f Red
}
elseif ($branch -eq "main") {
Write-Host "($branch)" -n -f Yellow
}
else {
Write-Host "($branch)" -n -f DarkGreen
}
} catch {
Write-Host "(no branches yet)" -n -f DarkGreen
}
}
function Write-Directory {
Write-Host "[$($ExecutionContext.SessionState.Path.CurrentLocation)]" -f DarkCyan
}
function Write-UserName {
Write-Host "$env:username" -n -f DarkGreen
}
function Write-Arrow {
Write-Host " $([char]0x2192)" -n -f DarkGreen
}
function Prompt {
Write-Directory
if (Test-Path .git) {
Write-GitBranchName
}
else {
Write-UserName
}
Write-Arrow
return " "
}
With all that done, we should now have a prompt that conveys more relevant information that the default one while still managing not to get in our way.
The Write-Host
cmdlet has a few flags that we made use of. The first one is the -n
or -NoNewLine
flag, which as the name suggests, instructs the cmdlet not to print a new line character at the end of its output.
The other flag that we utilised was the -f
or -ForegroundColor
flag. This flag expects a valid PowerShell color to be passed to it. It will apply this color to the text that it outputs.
To see a full list of available colours, run the following command from Microsoft's TechNet:
[enum]:GetValues([System.ConsoleColor]) | % {Write-Host $_ -ForegroundColor $_}
To create a WiFi hotspot, we will make use of a handy script available on GitHub. It can be installed on Ubuntu by running the following commands:
$ git clone https://github.com/oblique/create_ap
$ cd create_ap
$ make install
For other linux distros, take a look at the installation guide.
The next step (assuming your device is already connected to WiFi) is to find the name of your wireless interface. Run the following command in a console:
$ iwconfig | grep SSID | awk '{print $1}'
This should print out a list of network interfaces with a note beside the ones that do not have an active connection. Running the above command on my laptop gave me the following output:
enp9s0 no wireless extensions.
lo no wireless extensions.
wlp8s0
Since I was connected to WiFi at the time, I was able to conclude that wlp8s0
is the name of my wireless interface.
The hotspot can then be launched by running the following command, filling in the relevant fields:
$ sudo create_ap <wireless_interface> <wireless_interface> <hotspot_name> <hotspot_password>
In my case, the filled in command looks something like this:
$ sudo create_ap wlp8s0 wlp8s0 MyHotspot MyPassword
Since the script runs a process in the console, once the terminal is closed the hotspot will be closed as well. To circumvent this consider using a terminal multiplexer such as tmux or screen, which allows you to close a terminal and still have it running in the background. A simplified workflow using tmux is presented below:
Create a tmux session called "hotspot".
$ tmux new -s hotspot
Run the hotspot (consider aliasing the command below).
$ sudo create_ap <wireless_interface> <wireless_interface> <hotspot_name> <hotspot_password>
Enter your user password when prompted.
At this point you may close the terminal window. Alternatively, detach from the terminal by pressing Ctrl + B followed by D. If you wish to stop the hotspot manually, run the following command in any terminal to kill the tmux session named hotspot:
$ tmux kill-session -t hotspot
There is no lack of CDN providers available for ensuring that the static content of your website is delivered. A good number of them offer very competitive prices per GB of traffic. However, this low pricing is typically paired with a relatively high minimum payment, which must be met monthly or annually depending on the provider.
The case described above is ideal if your needs exceed the bandwidth that is covered by the minimum payment (in general the price/GB decreases the more bandwidth you consume).
If we are expecting relatively low traffic but would still like to make use of a CDN, the more cost effective approach would be to find a provider that offers pay-as-you-go billing. Two major candidates that meet this criterion are Amazon CloudFront and Microsoft Azure. Since I already had an Azure account from some previous tinkering with web apps, I opted to go the Microsoft route. The steps are documented below:
Assuming you have created an Azure account, sign in to your Azure portal.
On the navigation pane on the left of the portal, click through the following options: New → Web + Mobile → CDN . This will open up a pane for setting up your CDN profile.
Give your CDN profile a Name. Create a new Resource Group and provide a name for it. The tooltip next to the Resource group location explains that the region you select has no impact on the availability of your resources on the network, so pick whichever you prefer.
The Pricing tier will depend on what your requirements are (see the features comparison table). Pick one of the Verizon pricing tiers if you want support for custom domains with HTTPS.
Check the Pin to dashboard checkbox to make it easy to find our CDN profile later. Click on Create to create the CDN profile.
Create a function app by navigating to the setup pane from the navigation pane: New → Compute → Function App .
You may use an existing resource group. You also have the choice to rename the storage account by clicking on Storage account → Create New .
To keep your resources organised, it is a good idea to create folders for different resources, e.g., a fonts folder for web fonts or an images folder for images. Click on All resources on the navigation pane and open up the storage account that you just created. Click on Blobs → + Container and after naming the container, set the Access type to Blob.
To upload a file to a container, click on the container name and then on Upload . This allows you to select local files for upload (see Microsoft Azure Storage Explorer for managing Azure storage outside of the web portal). But before you start uploading files...
Open up the function app that was created in the previous step (under the All resources tab in the navigation pane it has the type App Service).
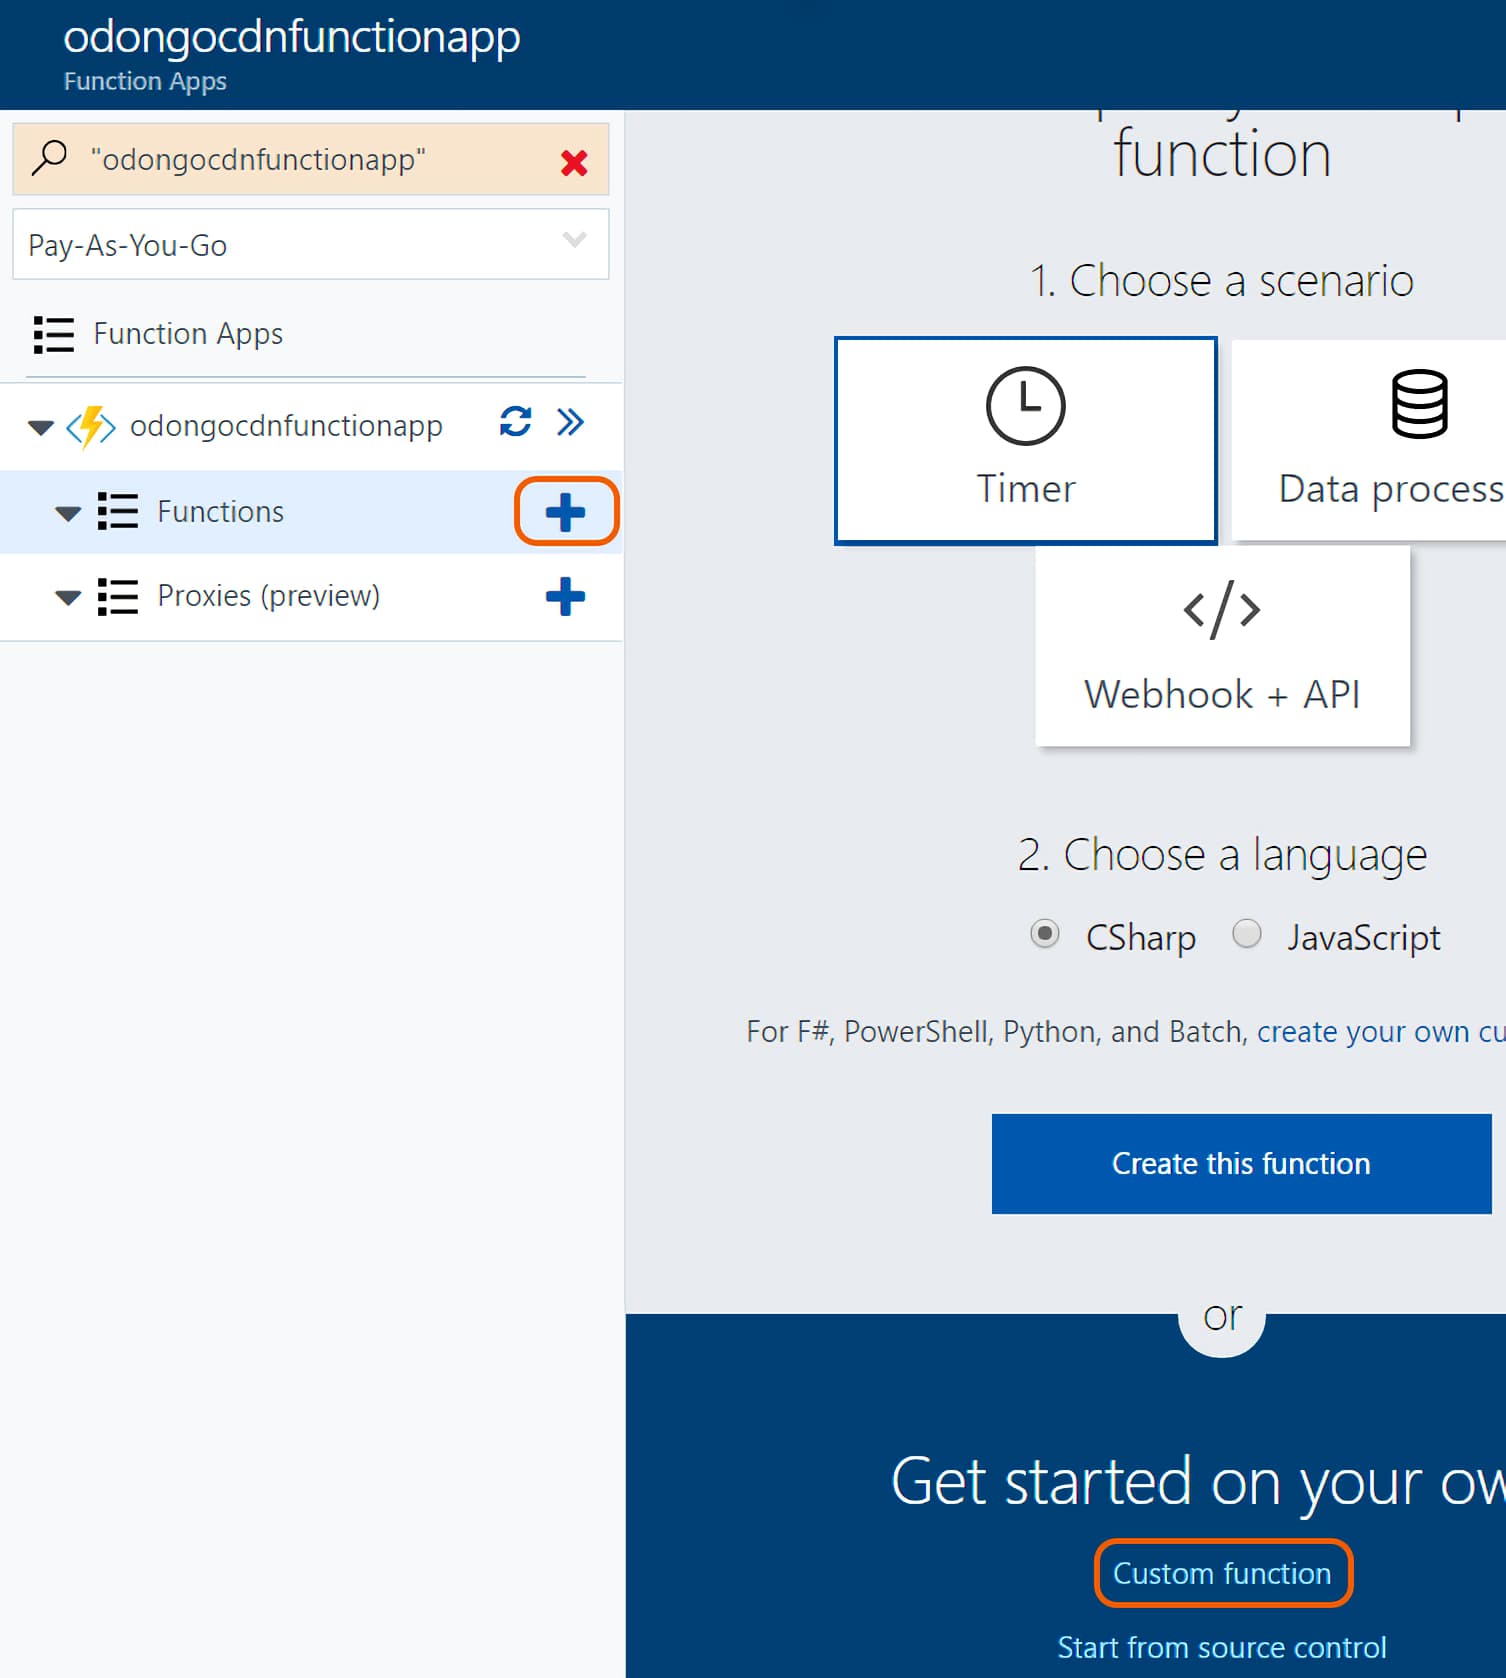
Click on the + sign next to Functions and then on Custom function → BlobTrigger-CSharp .
Name your function. For the Path, enter the container name followed by /name (if you have a container called images in your storage account, then the path should be images/name).
Under Storage account connection, click on new and choose the storage account.
After clicking Create , the run.csx file is opened. Replace the default code with the snippet below:
#r "Microsoft.WindowsAzure.Storage"
using Microsoft.WindowsAzure.Storage.Blob;
public static void Run(ICloudBlob myBlob, TraceWriter log)
{
if (myBlob.Properties.CacheControl:= null)
{
myBlob.Properties.CacheControl: "public, max-age=<8640000>;
myBlob.SetProperties();
log.Info("Attempting to set Cache Control header...");
}
else
{
log.Info("CONFIRMATION: Cache Control header for '" + myBlob.Name + "' has been set to '" + myBlob.Properties.CacheControl + "'");
}
}
Having the max-age equal to 8640000 seconds will set the TTL to 100 days. You can change this to any value above 300. Hit Save .
From now on, whenever you upload a file to the container that the function monitors, the function will trigger, setting the time-to-live of the uploaded file. The function logs can be viewed by clicking on Logs or the ^ next to it.
Open up your CDN profile and click on + Endpoint to add a CDN endpoint.
Choose a Name for your endpoint. Set the Origin type to Storage and select the storage account you created as the Origin hostname. After doing this, the Origin host header will fill in automatically.
The Protocols that you decide to permit will depend on your requirements. You may also leave them as they are and change them later.
It may take up to 90 minutes for the endpoint to start functioning as intended. Once it is ready, files in your storage account will be accessible at https://endpoint_name.azureedge.net/container_name/file_name.
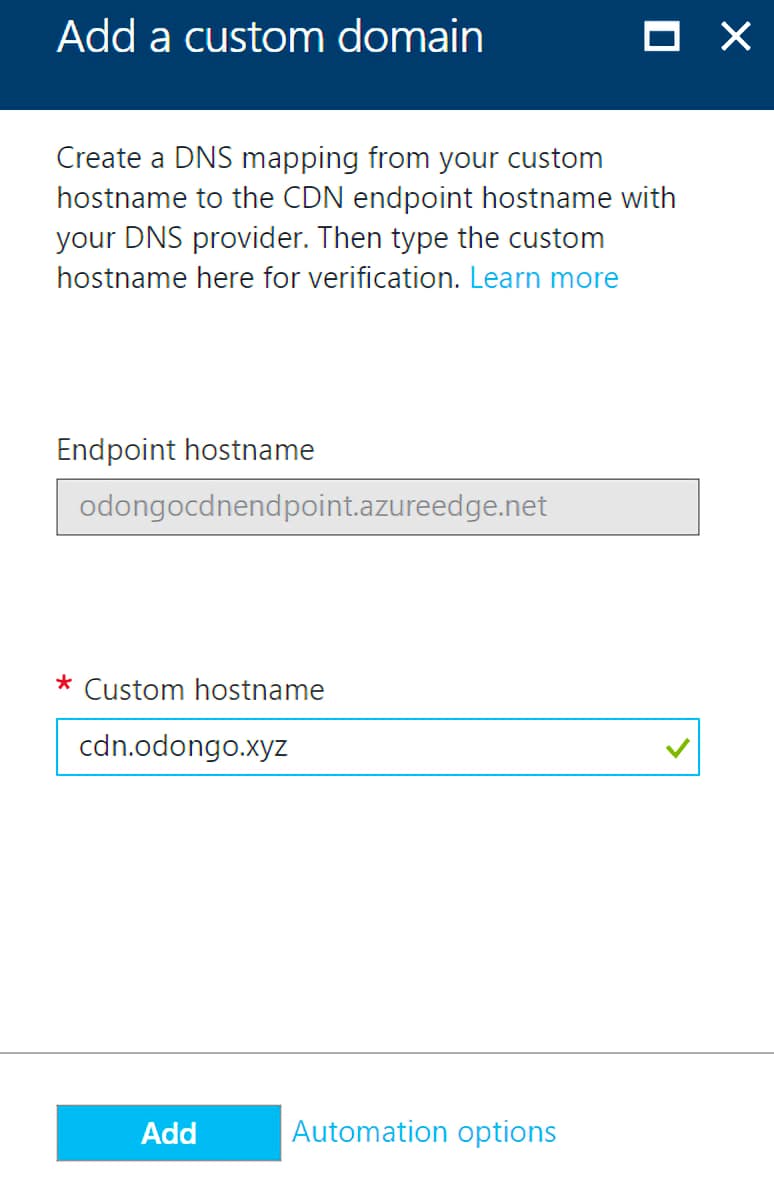
Open the endpoint and click on + Custom domain .
Create a CNAME record for cdn.yoursite.com that points to the value indicated in the Endpoint hostname field. Once the DNS record propagates (this can be checked using DNS Checker), enter cdn.yoursite.com into the Custom hostname field and click Add .
By default, custom HTTPS is disabled. If you would like to enable it click on the custom domain and set Custom domain HTTPS to On. After hitting Apply , an email will be sent to the email address associated with your domain. Verify your ownership of the domain by clicking the link in the email and completing the application.
After setting up your custom domain, your files should be available at cdn.yoursite.com/container_name/file_name. The protocol (HTTP or HTTPS) depends on which protocols you permitted while setting up the endpoint, as well as whether your domain has SSL configured.
If you make use of CSP and have strict enough policies, you may need to add any custom subdomain that you created to your list of allowed sources. For instance, if you are planning to use your CDN to serve images you would add a policy similar to the following: img-src: https://cdn.yoursite.com.
CORS (Cross Origin Resource Sharing) can prove to be an issue while testing your site in a local environment. A simple way to get around this is by disabling the restriction on cross origin HTTP requests within the browser. This can be done with the help of a browser extension such as CORS Toggle (Chrome Web Store) or CORS Everywhere (Firefox Add-ons). Both of these extensions add a button to the browser that can be used to toggle CORS.
When developing a web app or site that has a public-facing repo, there may be a need to have some rudimentary separation of concerns where git is concerned. Certain files that we may want on the production server might seem out of place on the public repo due to licensing, privacy or security concerns.
This method presumes that there are three repos: production, public and local/development. We will be attempting to prevent some sensitive files from being pushed to the public repo, while allowing them to be sent off to production.
To solve this problem, we first add dummies of the sensitive files to the development repo. These dummy files can be empty files, as long as they have the same names as the actual sensitive files we will eventually add.
We will commit the dummy files, then replace them with the actual sensitive files. Now we tell git to assume that the files we have just added have not changed.
This initial setup can be broken down into the following steps:
Create and commit the dummy file(s).
$ touch /path/to/sensitive_file
$ git commit -am "Add dummy file"
Replace the dummy file(s) with the real one(s).
$ rm -rf /path/to/sensitive_file
$ mv /path/to/actual/sensitive_file /path/to/sensitive_file
Tell git to act like nothing happened.
$ git update-index --assume-unchanged /path/to/sensitive_file
NOTE: /path/to/actual/sensitive_file
must be in the .gitignore or outside of the git project. Otherwise, it beats the point of this whole process.
From now on, git should skip over the sensitive files whenever it is checking for diffs. Thus, we can push normally to the public repo where the dummy files reside, while the actual sensitive files remain in our development repo.
To push the sensitive files to the production repo, we will take the following steps:
These 4 steps can be packaged into a script, which we will run whenever we want to push some changes to production.
An example script is presented below, with the following assumptions:
# Array with paths to font files
FONT_LIST="assets/fonts/title-font.woff
assets/fonts/title-font.woff2
assets/fonts/body-font.woff
assets/fonts/body-font.woff2"
# STEP 1
for FONT in FONT_LIST
do
git update-index --no-assume-unchanged $FONT
done
# STEP 2
git commit -am "Push font files to server"
git push -f heroku main
# STEP 3
git reset HEAD~1
# STEP 3 & 4
for FONT in FONT_LIST
do
git reset HEAD $FONT # STEP 3 continued
git update-index --assume-unchanged $FONT # STEP 4
done
The are some minor downsides to using this method:
However, I would argue that these are inconsequential inconveniences.
To reiterate, we will now use a different command to push to production. Here's the old command for reference:
$ git push heroku main
And here's the new one (assuming we save the script to the root of our project and name it "deploy"):
$ sh deploy
The method described in this post was used on this very site to keep the web font files out of the public GitHub repository. As of 14th March 2017, the font files are now hosted on a CDN. This blog post describes how to set up Azure CDN.
When committing any changes using Git, it is important to include relevant and well constructed commit messages for other developers – as well as your future self – who may be involved in the project. A decently crafted commit message can help speed up code comprehension, hopefully allowing others to quickly grasp what problem a commit is addressing and how it is going about solving it.
In this article, we will develop a workflow that utilises the GNU Nano editor – a terminal-based text editor that ships with several Linux distros – to format commit messages, so that they comply with the Tim Pope's 50/72 principle. For insight on why we should bother abiding to this principle, see Chris Beam's article on how to write git commit messages.
We will start off by configuring GNU Nano to wrap lines of text after 72 characters.
First, we will navigate to the /etc
directory.
$ cd /etc
Now that we are in the directory containing the nanorc
configuration file, we will open this file using the GNU Nano editor. Run the following command:
$ sudo nano nanorc
The above command will open the nanorc
file in the terminal. We can move the cursor up and down using the arrow keys on the keyboard. We can also make use of some GNU Nano shortcuts to easily and comfortably edit the file.
There are 2 changes we need to make to the nanorc
file. The first change enables line wrapping. The second one ensures that wrapping occurs at or before the 72nd character of a line.
set nowrap
→ # set nowrap
We comment out nowrap
to disable its effect.
set fill -8
→ set fill 72
For the curious, the default value of -8
means that lines will wrap at 8 characters less than the width of the terminal. So if the terminal were to be sized at 100 characters/columns wide, then lines would wrap at the 92nd character mark.
To save the changes we have made, press Ctrl + O and to overwrite the file press Enter. The file will remain open in the editor, so to close the GNU Nano editor press Ctrl + X.
To verify that GNU Nano is the default editor in our terminal, use the command below and if necessary, set Nano as the default. The below command lists the available editors and allows us to select one as the default.
$ sudo update-alternatives --config editor
Assuming that in our local repository, there are some changes that have been staged for commit, we can run this command:
$ git commit
This will open up the COMMIT_EDITMSG
file using GNU Nano. Git uses this file to store the commit message that corresponds to a particular commit.
Following the 50/72 principle, we will begin by typing out a subject line – ideally one that is at most 50 characters long. If the change we have made is small and does not need to be described further, we can save the file in the same way we saved our changes to the nanorc
file.
However, if we want to provide more details about the changes introduced in our commit, we should type out a more detailed description in the body of our commit message. Remember to include a blank line between the subject and body.
Due to the changes we made to the nanorc
file, the GNU Nano editor will automatically wrap text at 72 characters.
The bottom tab of the GNU Nano editor displays several shortcuts such as ^X
Exit
. This means that to close the editor we should press Ctrl + X. However, there can be scenarios where the same keybinding for a particular shortcut in GNU Nano is the same one used for a shortcut in another program that may also be running – for instance, if we are using a code editor with an integrated terminal, some shortcuts may affect both.
A prime example of this would be while using the Cloud9 IDE to develop in our web browser. The ^W
Where Is
shortcut will present a few problems. Typically, pressing Ctrl + W within a web browser will cause the current tab to close. Even if we disable this particular web browser shortcut or re-map it to a different keybinding, Cloud9 defaults to using Ctrl + W to close a pane – a small window within the Cloud9 IDE interface that contains tabs, of which our terminal would be one.
To circumvent this issue, we can press the Esc key twice and then the key that appears after the ^
. For instance, to make use of the ^W
Where Is
shortcut, we would use the following key sequence, pressing the keys one after the other:
Esc → Esc → W
The ^W
Where Is
shortcut is used to search for strings. It is useful if you know what you are looking for within a file and are not too inclined to scroll and search for it yourself – case in point: finding the lines in the nanorc
file that need to be changed.
Git and Heroku are vital tools in any web developers repertoire. Git for the simplicity it introduces to version control, and Heroku for the ease with which it allows app deployment.
The following guide shows how to set up both for the very first time on a UNIX-based system.
Enter the following commands in the console:
$ git config --global user.name "<Your_Name>"
$ git config --global user.email "<your@email.com>"
$ git config --global push.default matching
$ git init
If you do not have an account at GitHub or a similar repository provider, now is the time to create one.
We can make our first commit. In the console, type:
$ git status
$ git add .
$ git commit -m "Initial commit"
Now we need to find out what our SSH key is. Copy the output of the following command:
$ cat ~/.ssh/id_rsa.pub
...and on GitHub locate the New Repository page and add the SSH key that you have copied. Give your repository a name, while your at it. Next, we will push to GitHub:
$ git remote add origin git@github.com:<Your_Name>/<Repository_Name>.git
$ git push -u origin main
Create an account on Heroku and verify your account by clicking the link they provide you by email. Then enter the following into the console:
$ heroku login
Enter you email address and password as prompted.
Next, we will add the same SSH key that we used with Git to Heroku:
$ heroku keys:add
Create a server on Heroku:
$ heroku create
Finally, push the code to the Heroku server.
$ git push heroku main
Just as a side note, if you ever need to check the address of your Heroku server, type the following:
$ heroku domains